How To Change Content Based On A User’s Location In WordPress
Need a way to change content based on a user’s location on your WordPress site? You can do many different things if you change content based on a user’s location.
You can:
- Show different ads based on a user’s location to maximize your ad revenue.
- Display localized messages inside your posts or pages.
- Restrict access to content based on a user’s location.
- Display different widgets in sidebars or other widget areas.
- Show a custom navigation menu.
The methods that I’ll show you today aren’t just limited to basic WordPress content, either. You can also use them to change plugin content, like your products at a WooCommerce store.
Keep reading for an easy step-by-step tutorial to start geotargeting your WordPress site’s content.
What You Need To Change Content Based On A User’s Location
To get started with Wordpress Geolocation, you’ll need to install the Geotargeting PRO plugin from Geotargeting WP. This plugin is free to download and includes a 14-day free trial, so you can follow this tutorial 100% for free.
The plugin gives you a few different options for changing your WordPress content based on a user’s location.
First, it gives you a shortcode that you can wrap around any content. This lets you change specific parts of a post, page, or custom post type. You can also use it inside other plugins. For example, you can include the shortcode in a WooCommerce product’s description.
Second, you also get a new meta box that lets you completely restrict entire posts, pages, or custom posts.
Finally, you get new geotargeting options for your widgets and menu items, as well.
How To Set Up The Plugin
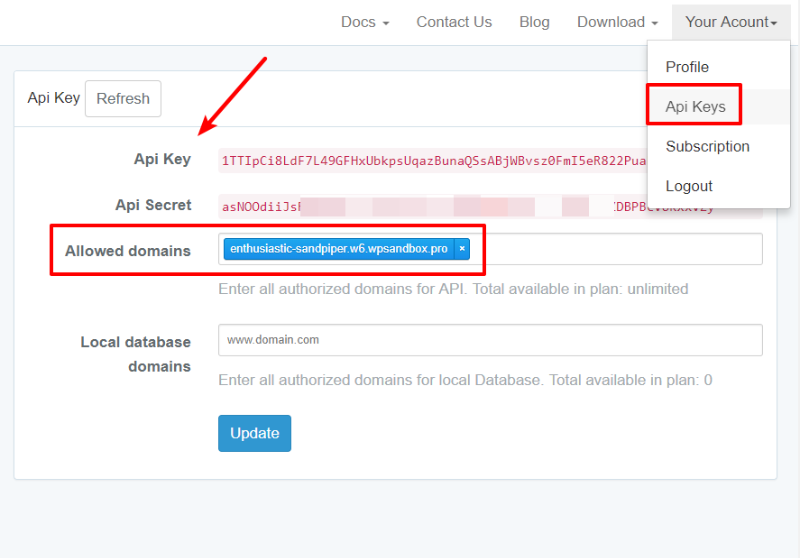
To set up the plugin after you’ve installed it, you’ll first need to go to your Geotargeting WP account and add your website in the Allowed domains area in the API Keys screen:
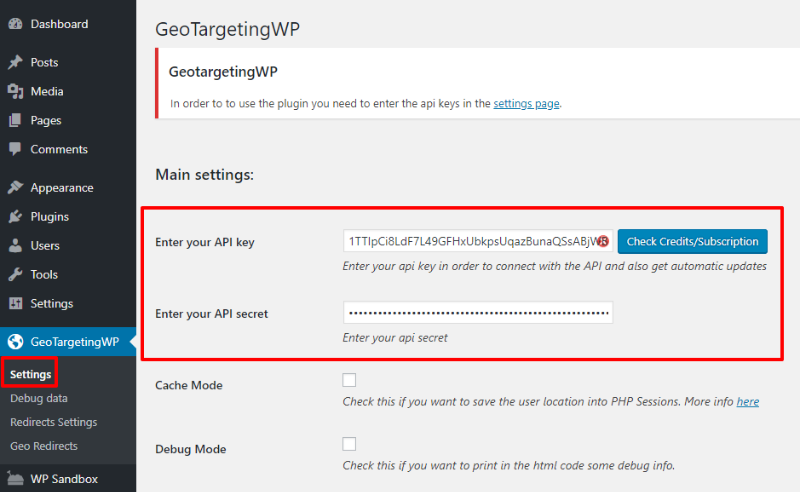
Then, take your API Key and API secret and add them to the plugin’s settings in your WordPress dashboard by going to GeotargetingWP? Settings:
Once you complete those two steps, you’re ready to follow the rest of the tutorial.
4 Scenarios: Change WordPress Content Based On A Visitor’s Geolocation
Now that you’ve got the plugin up and running, we’ll take you through four different ways that you can use it:
- Display different WordPress content based on geolocation
- Restrict access to WordPress content based on geolocation
- Display different WordPress widgets based on geolocation
- Display different WordPress menu items based on geolocation
We’ll go in-depth for the first method. Then, we’ll take things a little quicker for the last three methods because they’re really just about applying the same principles to different parts of your site.
How To Display Different WordPress Content Based On Geolocation
For this first method, you’ll use Geotargeting WP’s shortcode builder to restrict content inside a post, page, or custom post type.
To get started, go to the WordPress editor for the post or page where you want to geotarget content.
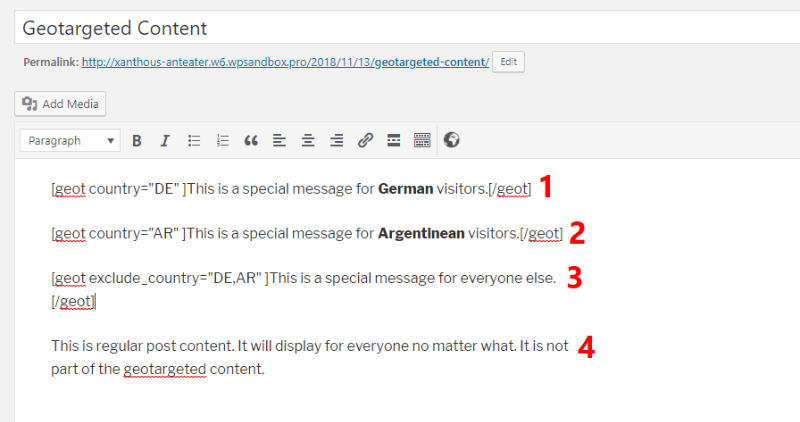
Then, add all the different content versions that you want to display in the WordPress editor. For this example, let’s say you want to display:
- One version of content for visitors from Germany
- One version of content for visitors from Argentina
- One version of content for visitors from everywhere else (except those two countries)
The same principles apply to any number of configurations. For example, you could target 6 individual countries. Or, you could target 1 country and have a fallback for everyone else. It’s totally up to you.
When you’re done, it should look something like this:
Then, select the first version of your content and click the new Country GeoTarget Content button on the editor toolbar:
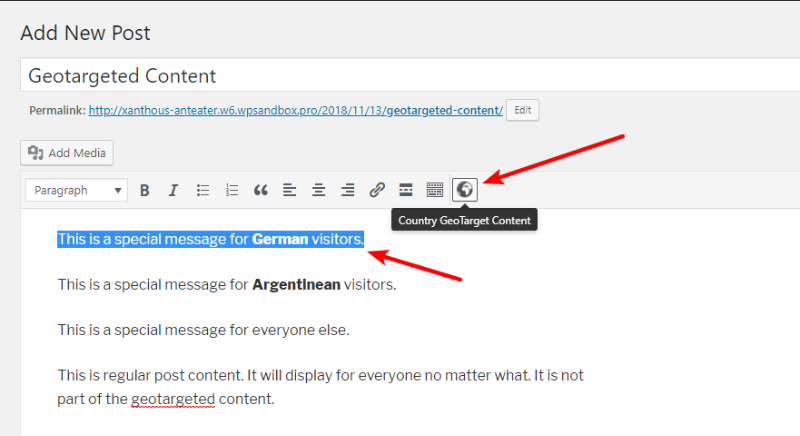
That will open the Geotargeting Shortcode interface. For this first bit of content, we want it to only display to visitors from Germany. To do that, you’d:
- Select Only show content in
- Choose Germany
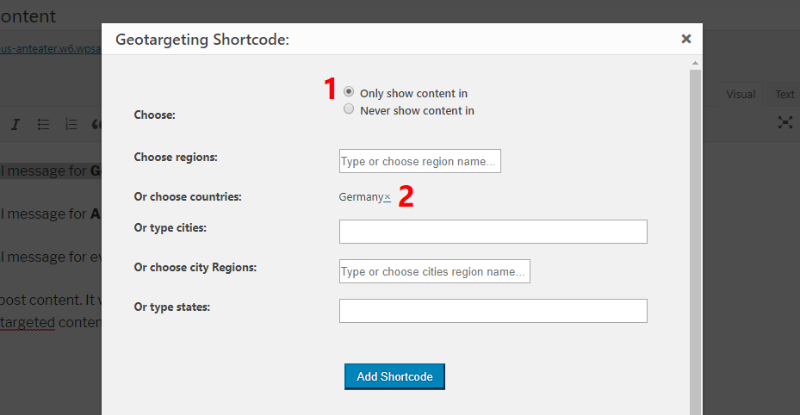
Then, click Add Shortcode.
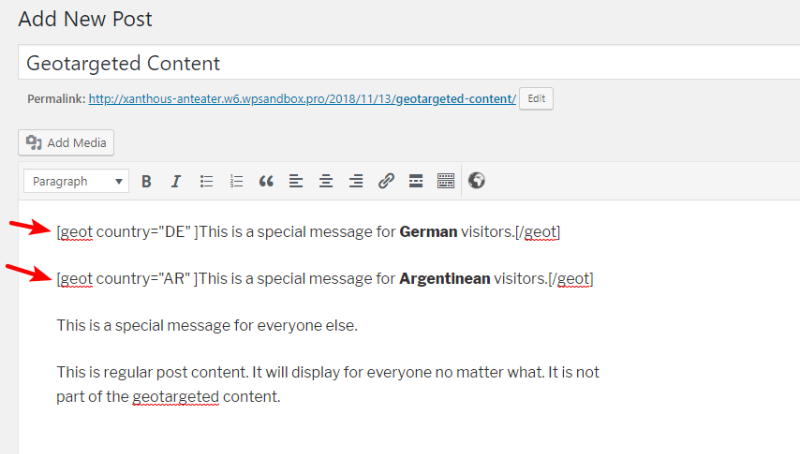
To create content targeted to a second country, you’d repeat the same thing but for a different country (Argentina in our example). After that, it should look something like this:
Finally, there’s the last bit of content that needs to display to everyone else except visitors from Germany or Argentina.
To do that, you open the same Geotargeting Shortcode interface. Only now, you:
- Select Never show content in
- Enter the countries that you’re already targeting (Germany and Argentina in our example)
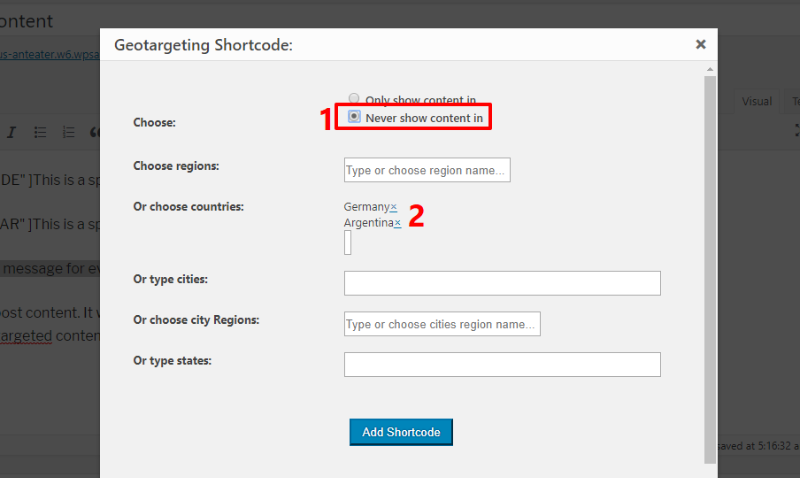
And that’s it! Your editor should now look like this:
Here’s who can see the content from the graphic above:
- German visitors
- Argentinian visitors
- Visitors from everywhere except Germany and Argentina
- All visitors
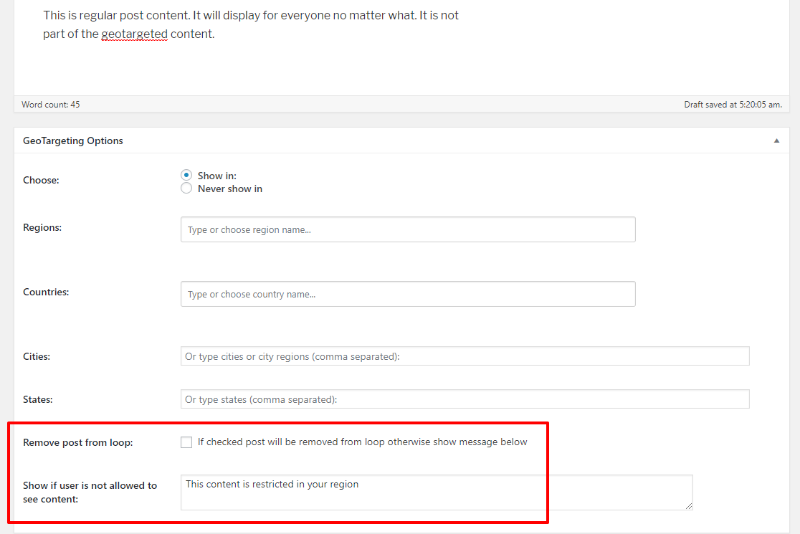
How To Restrict Access To WordPress Content Based On Geolocation
Sometimes, you might want to just completely restrict access to a post rather than only using geolocation for a part of the content.
If that’s the case, you can use the new GeoTargeting Options metabox instead of the shortcode.
This meta box displays below the editor for posts, pages, and any custom post types (including WooCommerce products).
Most of the options are identical to the shortcode builder. There are two new additions at the bottom, though:
- Remove post from the loop – when checked, the post will not appear in your blog post list for people from locations where it’s restricted.
- Show if the user is not allowed to see content – anyone who’s not from one of the allowed locations will see this message instead of the content.
How To Display Different WordPress Widgets Based On Geolocation
Sometimes you might want to display different widgets based on a user’s location. This is really handy for advertisements or other localized messages.
Again, you can apply the exact same principles from before.
When you go to manage your widgets, you’ll get a new Geotargeting option for each widget:
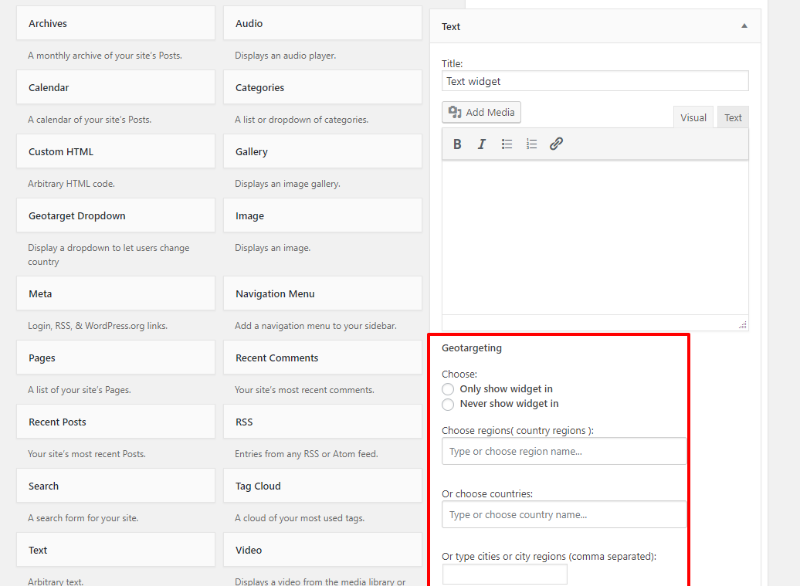
So if you want to display one widget for:
- German visitors
- Argentinian visitors
- Everyone else
Then you would create three separate widgets and use the Only show the widget in and Never show the widget in rules just like you would with the shortcode.
How To Display Different WordPress Menu Items Based On Geolocation
Last one! You can also use the same principles to display different WordPress menu items based on a user’s location.
When you go to Appearance? Menus in your WordPress dashboard, each menu item gets its own Geotargeting area:
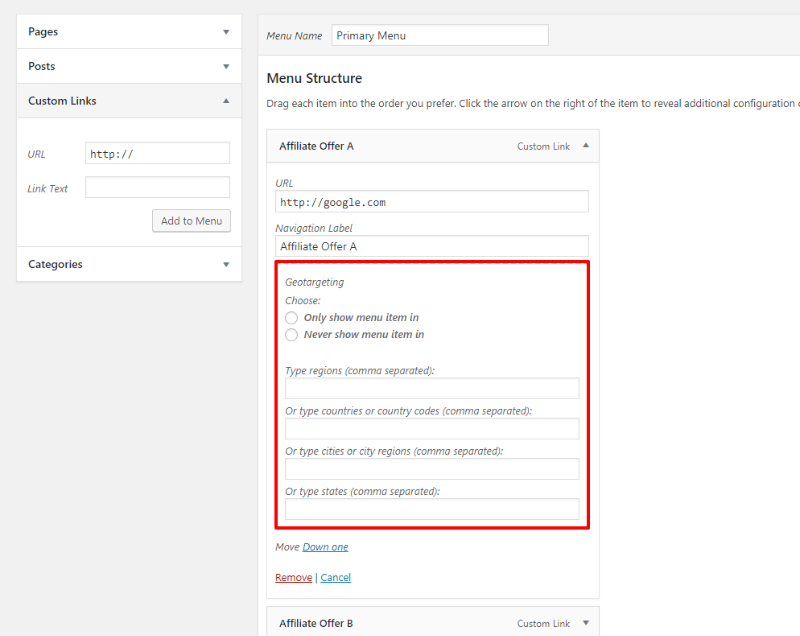
You can use the Only show menu item in and Never show a menu item in rules to target your menu items.
Get Started With WordPress Geolocation Today
Whether you want to use geotargeting for something big or small, Geotargeting PRO makes it easy to display different content based on a user’s location.
Conclusion: Is change content based on a user’s location worth it?
No matter where you’re using the plugin, the most important thing to remember is the interplay between the Only show in… and Never show in… rules. By combining the two types of rules, you’re able to create country-specific content as well as a fallback for other countries.
Do you have any other questions about how to change WordPress content based on a user’s location? Let us know in the comments!

Hi, with this tool can i a ask for region or city just when the visitor get in the site? with a popup or something