How to use WooCommerce Shipping Pro
WooCommerce Shipping Pro is an Ecommerce add-on for the WooCommerce WordPress Plugin to estimate cost of shipping. WithWooCommerce Shipping Pro, you can easily apply a complex set of rules for calculating the shipping cost estimates.
Here’s a step-by-step guide for WooCommerce Shipping Pro.
Remember : You need to have the WooCommerce Plugin installed & activated in order to use WooCommerce Shipping Pro add-on. Also you should have some basic knowledge of how to add products & shipping classes in WooCommerce. In case you have trouble getting started with WooCommerce click here.
WooCommerce Shipping Pro
Installation:
1. Download thewoocommerce-shipping-pro.zip file & unzip it into the plugins folder
which can be found at /wordpress/wp-content/plugins
2. Go to WordPress Dashboard -> Plugins -> Installed Plugins
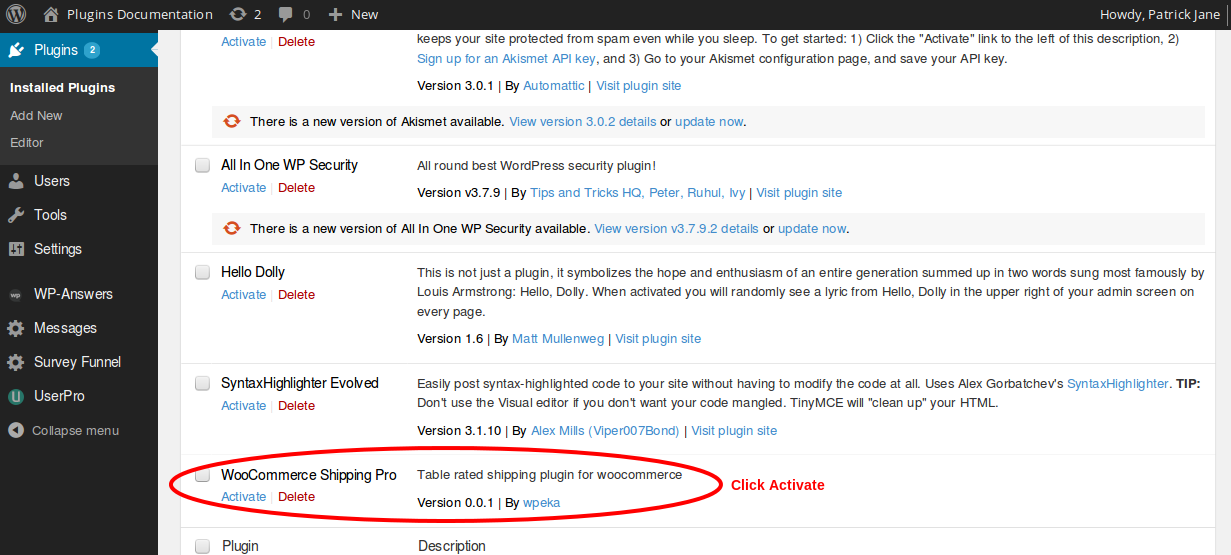
3. Activate WooCommerce Shipping Pro.
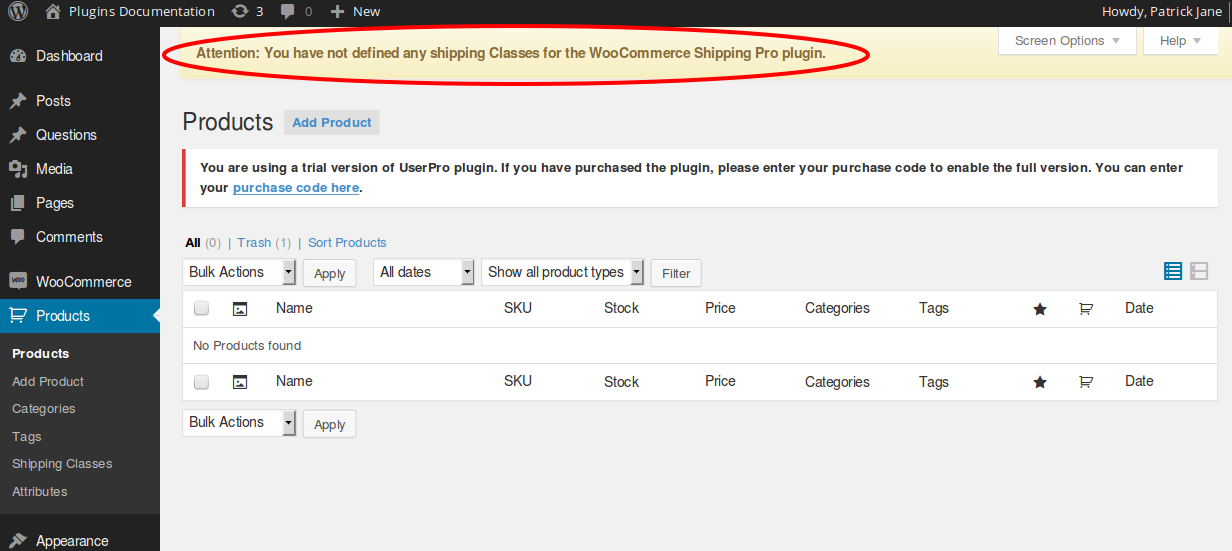
4. Go to WordPress Dashboard -> Products
Note that you’ll get an attention message as below since you have not defined any shipping classes.
Managing WooCommerce Shipping Pro
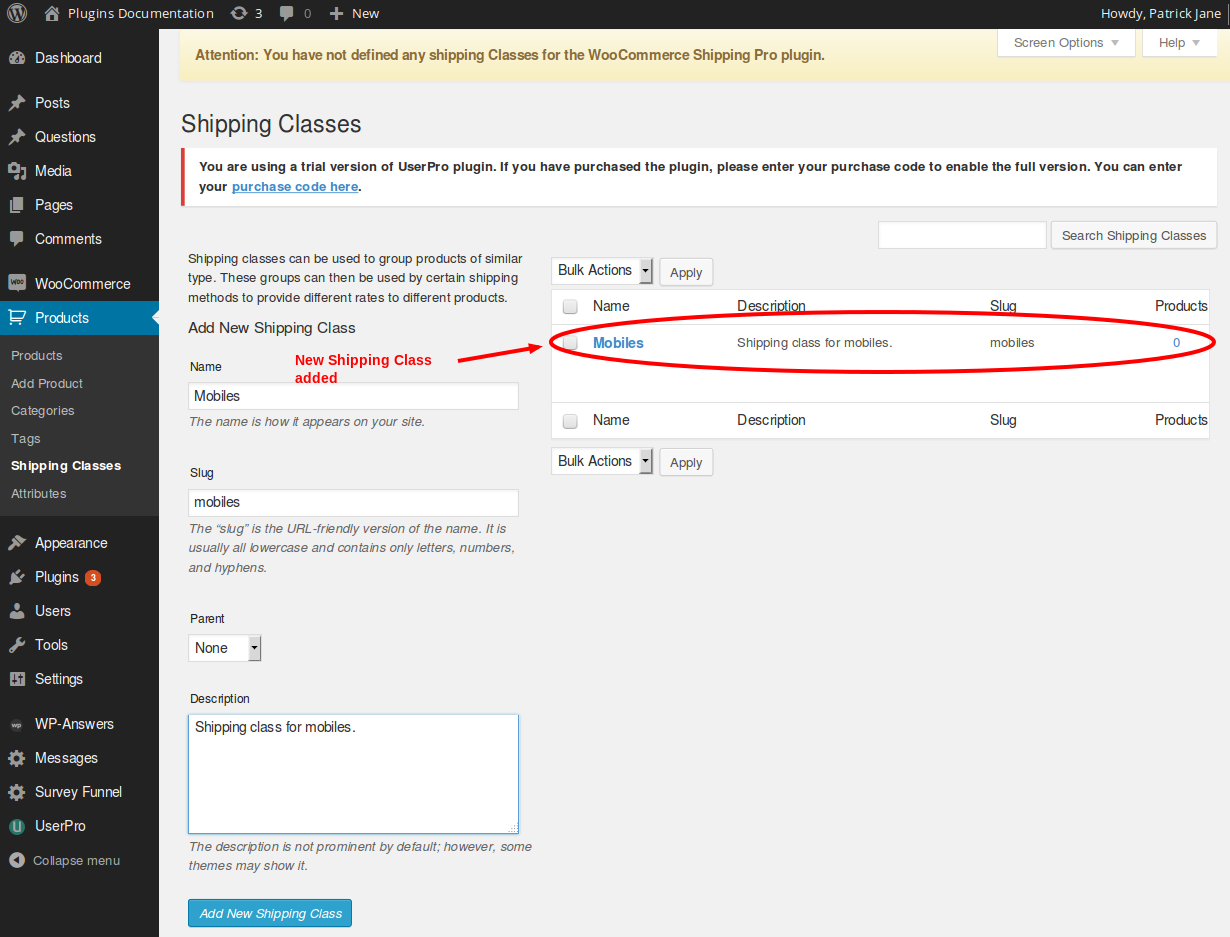
1. Shipping classes can be used to group products of similar type. These groups can then be used by certain shipping methods to provide different rates to different products. Lets add some shipping classes to get started. Go to Dashboard -> Products -> Shipping Classes.
Enter the details & click Add New Shipping Class. Your new shipping class is added now.
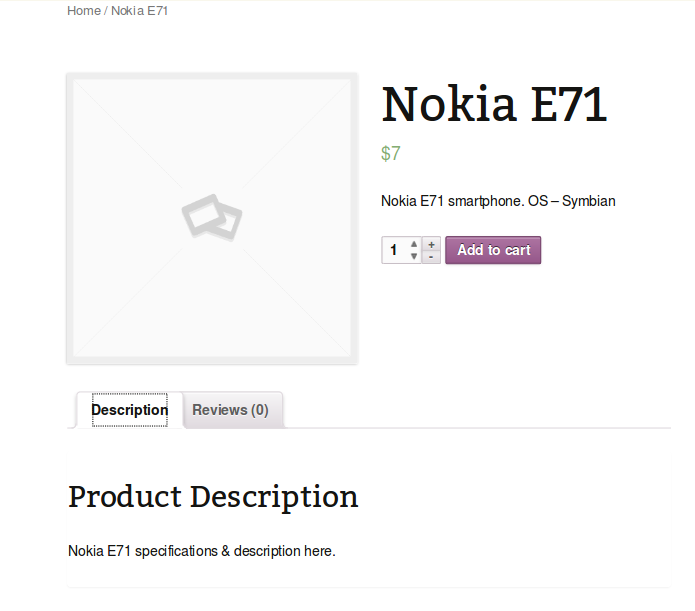
2. To add/manage products go to Dashboard -> Products -> Add Product.

Add the details & click Publish. Your new product is added onto the Shop page.
Note : WooCommerce doesn’t provide shipping methods based on geographical locations. This is where WooCommerce Shipping Pro steps in. We can set shipping zones based on geographical locations (This is related to transportation costs applicable as per legal aspects of a location).
3. Go to WooCommerce -> Settings -> Shipping Zone. Click Add New
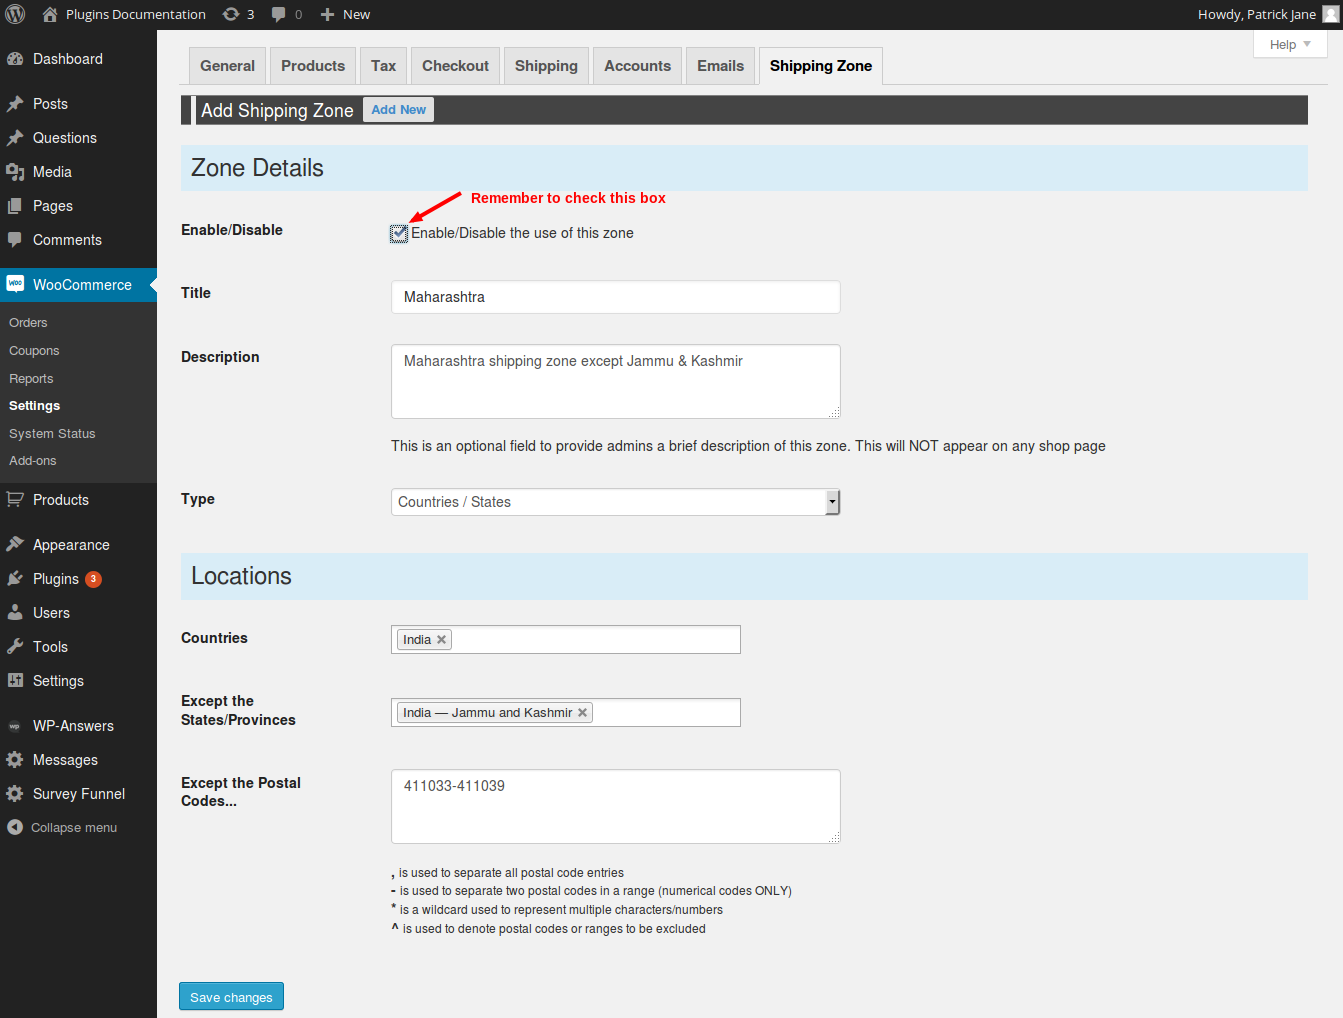
Zone Details :
3.1 Enable/Disable : Tick box to either enable/disable the use of the zone.
3.2 Title : Title for the zone dispalyed across the website.
3.3 Description : (Optional) Description of the shipping zone.
3.4 Type -> Everywhere | Countries / States | Postal Codes
Locations : Location details for adding exceptions. Dependent on the Type in Zone Details.
Type -> Everywhere : Global locations. We can mention exceptional countries.
Locations :
3.5 Countries : Countries where shipping will be allowed.
3.6 Except : Countries where shipping will not be delivered.

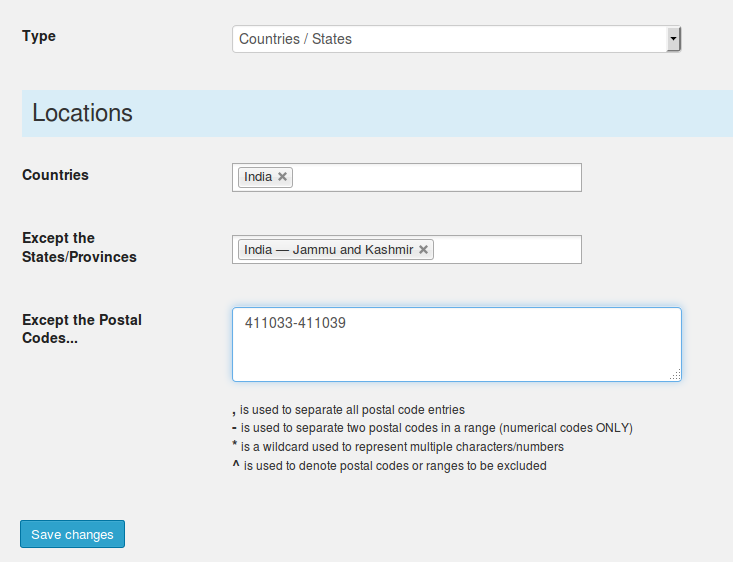
Type -> Countries / States : Restrictions based on countries / states.
Locations :
3.5 Countries : Countries where shipping will be allowed.
3.6 Except the states/provinces : States/Provinces where shipping will not be delivered.
3.7 Except the postal codes : Postal codes where shipping will not be delivered.
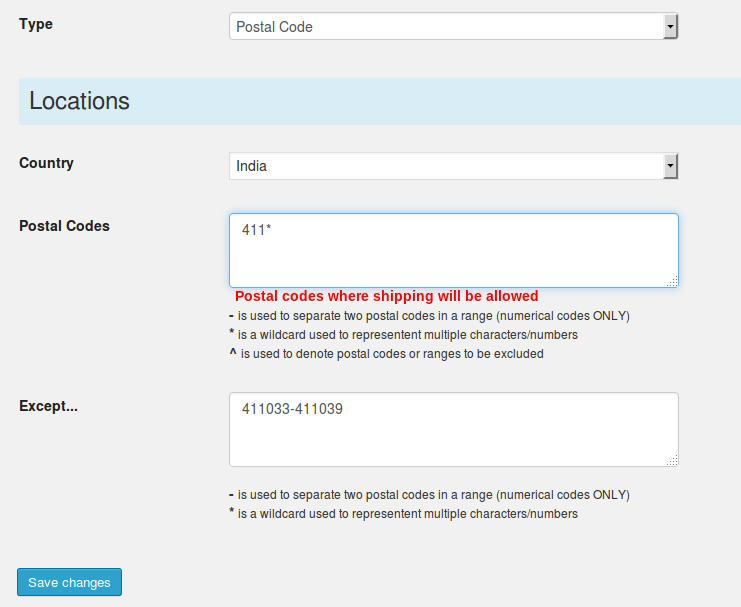
Type -> Postal Codes : Restrictions based on postal codes.
Locations :
3.5 Country : Countries where shipping will be allowed.
3.6 Postal Codes : Postal codes where shipping will be allowed.
3.7 Except : Postal codes where shipping will not be delivered.
Click Save changes when you are happy with the details.
4. Now we can manage our newly created shipping zone.
Navigate to WooCommerce -> Settings -> Shipping -> Shipping Pro
4.1 General Settings :
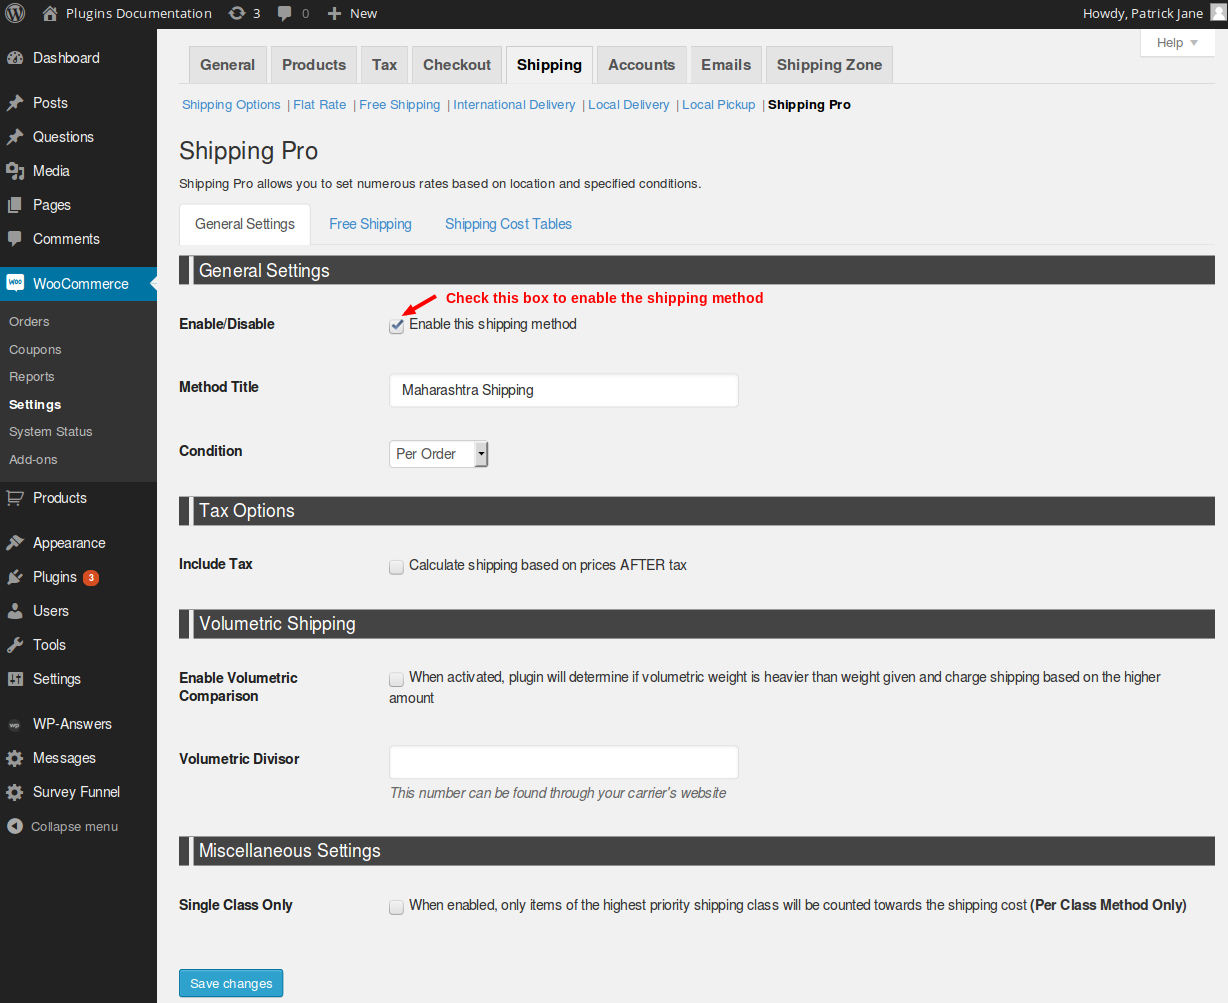
Enable/Disable : Enable/disable the shipping method.
Method title : Title for the method that only the administrator can change (displayed in shipping options & shows enabled/disabled)
Condition : Criteria for calculating the shipping cost. Per Order | Per Item | Per Class
- Per Order : based on the the number of orders.
- Per Item : based on number of items in the cart.
- Per Class : based on shipping class of the product.
Include Tax : Enable the include Tax checkbox to calculate the shipping amount after including the TAX.
Note : Specify TAX details in WooCommerce -> Settings -> TAX menu.
Enable Volumetric Comparison : To calculate the shipping cost based on volumetric details.
Volumetric Divisor : Carrier provides the volumetric divisor number.
Single Class Only : Only items of the highest priority shipping class will be counted towards the shipping cost (Per Class Method Only)
4.2 Free shipping : If we want to override the existing Free Shipping method of WooCommerce we can make changes here.
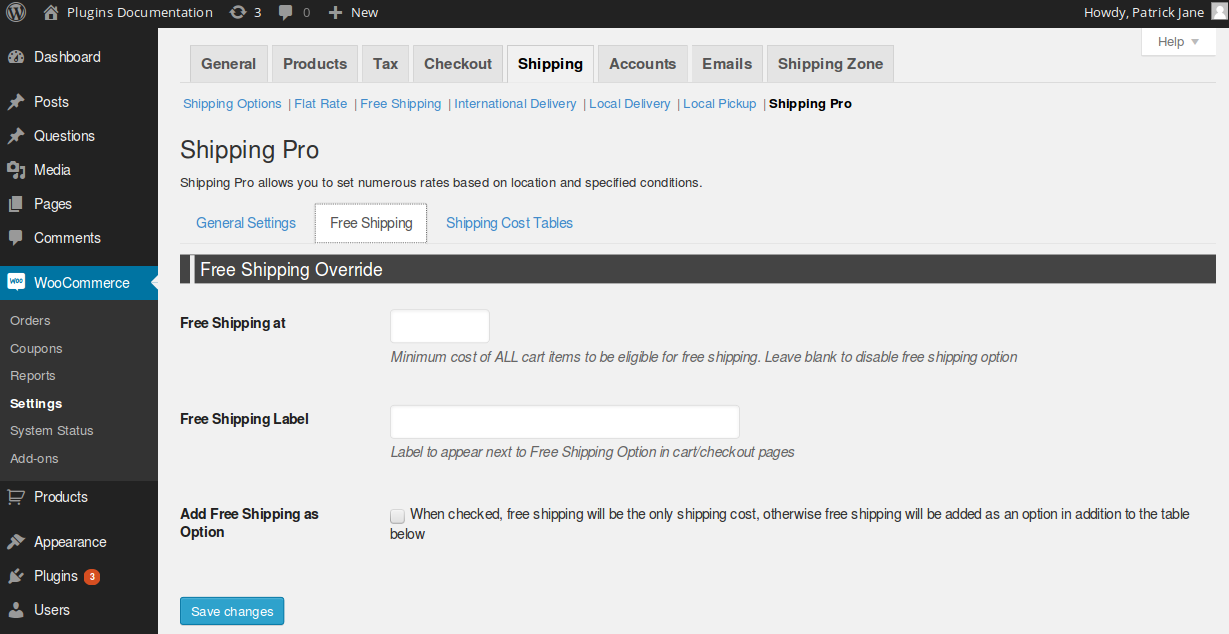
Free Shipping at : Specify a minimum cost of ALL cart items to be eligible for free shipping.
Free Shipping Label : Label to appear next to Free Shipping Option in cart/checkout pages.
Add Free Shipping as Option : When checked, free shipping will be the only shipping cost, otherwise free shipping will be added as an option.
4.3 Shipping Cost Tables : Add / Manage shipping costs
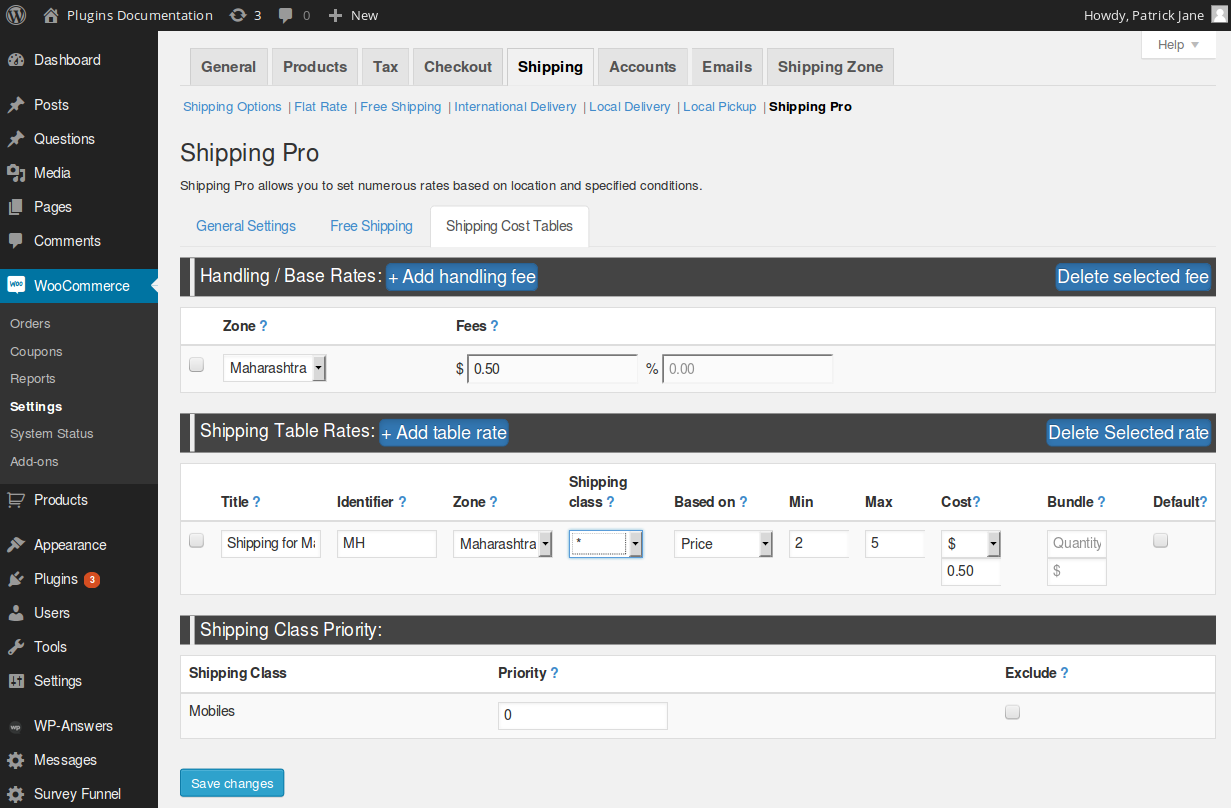
Handling / Base Rate : Add / Manage handling charges (these are fixed based on the shipping zones)

Shipping Table Rates : Add / Manage different rates for different shipping zones.

Title : Title for the shipping method.
Identifier : Unique identifier for the shipping method.
Zone : Zone for the shipping method.
Shipping class : * is to apply for all classes or drop down to select a single class.
Based on : Defines the criteria for applying the shipping table rates that you specify by the Min/Max options.
Min : Minimum cost for the shipping rates to apply.
Max : Maximum cost for the shipping rates to apply.
Remember : Set the max amount to the cost that could exceed after the subtotal is calculated.
Cost : Cost applicable for the shipping method.
- $ : fixed cost that will be applicable for the method.
- % : Percentage of the total cart amount.
- X : Multiply cost with the quantity of cart items.
- w : Multiply weight with the cost of cart items.
- d : Deny. The table rate will not be applicable.
Bundle : This is for bulk ordering rates. Specify the quantity. cost for quantity specified in bundle is applicable initially, then above the bundle quantity number of items the bundle price will be applicable.
Default : Set this shipping method as default.
Shipping Class Priority : Manage priorities for the shipping methods.

Shipping Class : Name of the shipping class.
Priority : Set priority for the shipping class. Largest number is the highest priority.
Exclude : If shipping is free for item with this class, check the box to exclude this cart items from the per order method.
5. Click Save Changes when done.
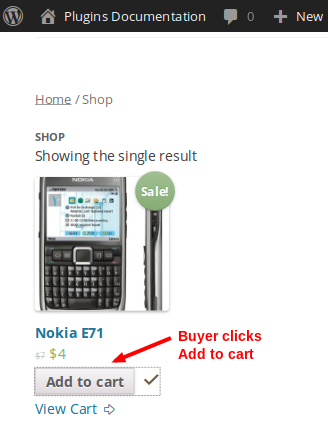
WooCommerce Shipping Pro in action
Let’s see how WooCommerce Shipping Pro works for the buyer.
1. Buyer visits the Shop page to add products to his/her cart.
2. Updates the cart & selects the shipping method.
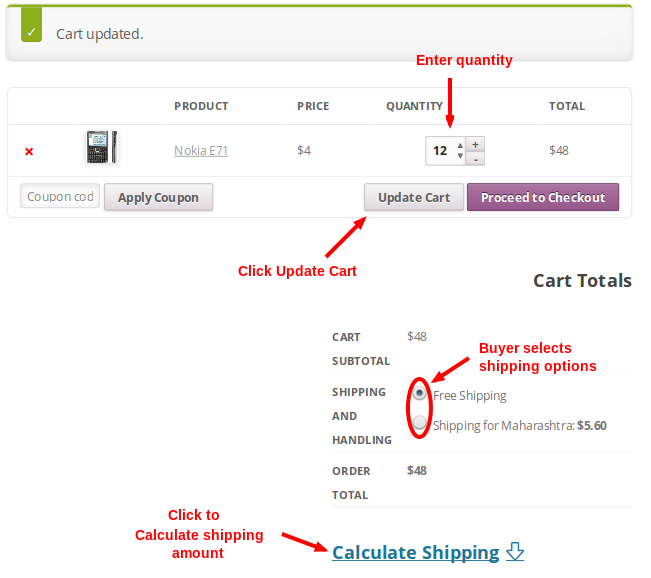
3. Total cart amount is calculated. Buyer clicks Proceeds to Checkout for payment.
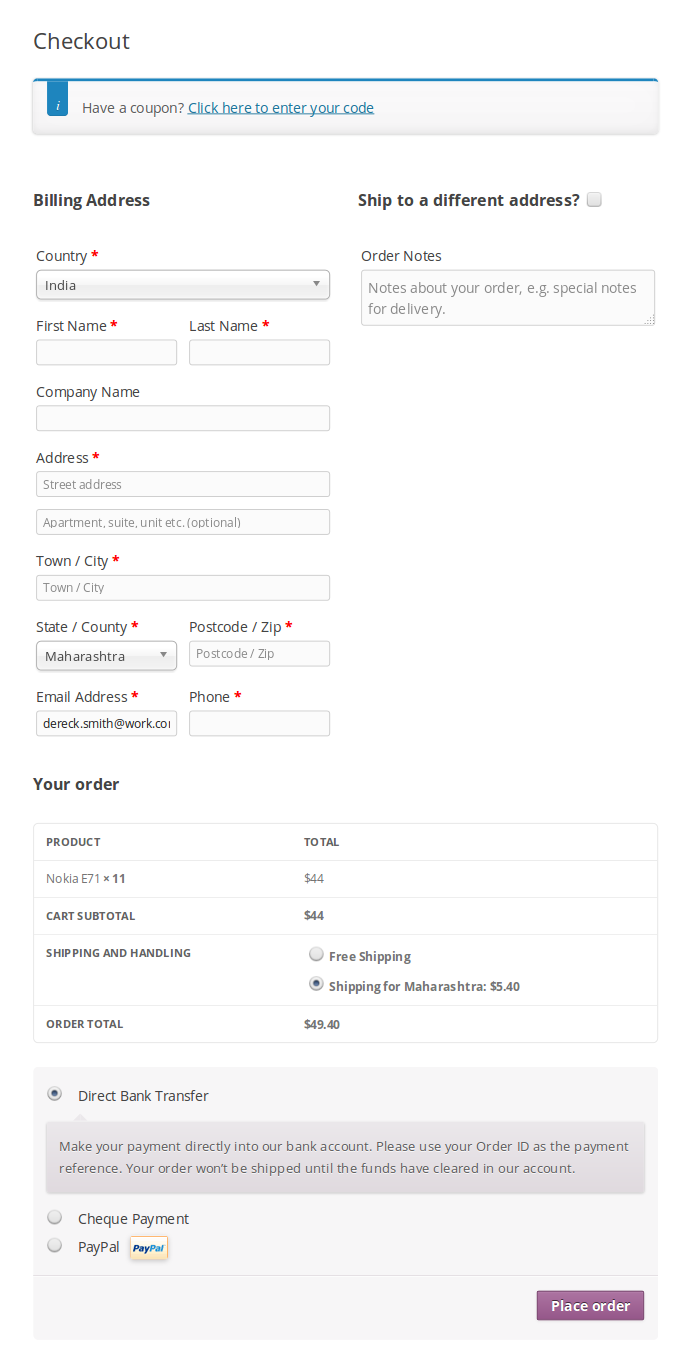
4. Buyer clicks Place Order when done. Buyer gets an acknowledgment message along with the order & customer details on the Checkout page after being redirected from the payment service.
So that’s pretty much what you need to know in order to use WooCommerce Shipping Pro effectively. If you know of any other tips that I may have missed, do let me know by leaving a comment here.
Add this powerful plugin to your eCommerce dashboard and make shipping a breeze.

Leave a Reply